Ever wondered how to replace the string on your Stihl FSA 60 R? Well, you're not alone. This powerful little tool is a game-changer for lawn care, but knowing how to maintain it is equally important. Whether you're a seasoned pro or a newbie, understanding the ins and outs of replacing the string can save you time and money.
Imagine this: you're happily trimming your lawn, and suddenly the string snaps. Frustrating, right? But don't sweat it! With this guide, you'll learn everything you need to know about Stihl FSA 60 R string replacement in no time. Plus, we'll throw in some tips and tricks to keep your trimmer running smoothly.
Before we dive deep into the nitty-gritty, let's get one thing straight. The Stihl FSA 60 R is more than just a trimmer—it's a reliable companion for all your landscaping needs. And like any good tool, it deserves a little TLC now and then. So grab your favorite drink, and let's get started!
Read also:Pablo Torre Elizabeth Doherty The Untold Story You Need To Know
Understanding the Stihl FSA 60 R
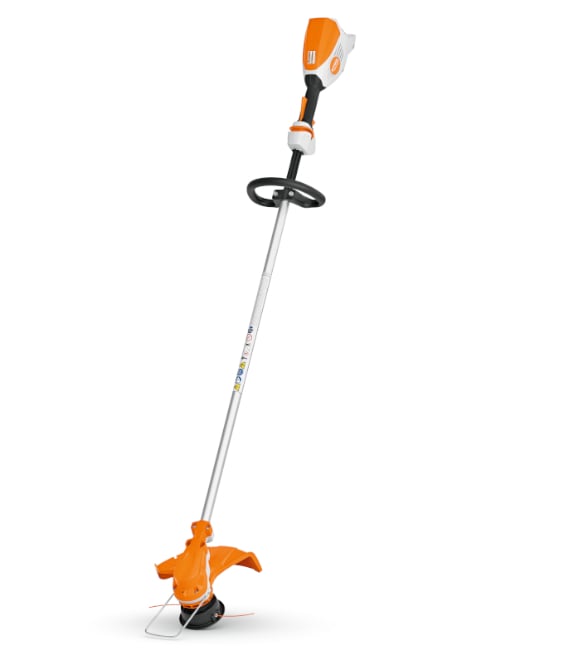
First things first, let's talk about what makes the Stihl FSA 60 R so special. This battery-powered brushcutter is designed for efficiency and ease of use. Its lightweight design and ergonomic handle make it perfect for extended use, while its powerful motor ensures it can handle even the toughest jobs.
Key Features of the Stihl FSA 60 R
- Powered by a 36V battery for long-lasting performance.
- Features a single-line cutting head for precision cutting.
- Includes an adjustable shoulder strap for comfort.
- Easy to maintain with straightforward parts replacement.
Now that we've covered the basics, let's move on to the main event: replacing the string.
Why Replace the String on Your Stihl FSA 60 R?
Replacing the string on your Stihl FSA 60 R is essential for maintaining its performance. Over time, the string wears out or breaks, which can affect the trimmer's ability to cut effectively. A frayed or worn-out string can also damage your lawn or garden, so it's crucial to keep it in top condition.
Think of the string as the heart of your trimmer. Without it, your Stihl FSA 60 R is just a fancy stick with a motor. By replacing the string regularly, you ensure that your tool remains reliable and efficient, ready to tackle any landscaping challenge that comes your way.
Tools You'll Need for Stihl FSA 60 R String Replacement
Before you start the replacement process, make sure you have all the necessary tools and materials. Here's what you'll need:
- A new spool of string compatible with the Stihl FSA 60 R.
- A small screwdriver or wrench (depending on your model).
- A pair of scissors or a utility knife.
- A clean workspace to avoid losing small parts.
Having these tools on hand will make the replacement process smoother and faster. Trust us; you don't want to be halfway through and realize you're missing something crucial!
Read also:Michael Wayans The Dynamic Star Who Shines Bright In Comedy And Beyond
Step-by-Step Guide to Stihl FSA 60 R String Replacement
Now that you're prepared, let's walk through the steps to replace the string on your Stihl FSA 60 R. Follow this guide carefully to ensure a successful replacement.
Step 1: Turn Off the Trimmer
Safety first, folks! Before you start tinkering with your trimmer, make sure it's turned off and unplugged. If you're using a battery-powered model, remove the battery to avoid any accidental starts.
Step 2: Remove the Cutting Head
Using your screwdriver or wrench, carefully remove the cutting head from the trimmer. Be gentle—this part can be a bit tricky, especially if the screws are tight. Take your time to avoid damaging the trimmer or injuring yourself.
Step 3: Inspect the Spool
Once the cutting head is off, inspect the spool for any signs of wear or damage. If the spool is in good condition, you can reuse it. However, if it's cracked or damaged, it's best to replace it with a new one.
Step 4: Thread the New String
Take your new spool of string and thread it through the hole in the center of the spool. Make sure the string is wound tightly and evenly around the spool. Once you've wound the string, cut it to the recommended length and insert the ends into the guide holes.
Step 5: Reassemble the Cutting Head
With the new string in place, reassemble the cutting head by placing it back onto the trimmer. Make sure everything is securely tightened before moving on to the next step.
Step 6: Test the Trimmer
Once everything is back together, it's time to test your trimmer. Reattach the battery, turn on the trimmer, and give it a test run. If everything works as it should, congratulations—you've successfully replaced the string on your Stihl FSA 60 R!
Troubleshooting Common Issues
Even with the best intentions, things can sometimes go wrong. Here are a few common issues you might encounter during the Stihl FSA 60 R string replacement process and how to fix them:
- String Won't Feed Properly: Check that the string is wound correctly and that the spool is installed the right way.
- Trimmer Won't Start: Ensure the battery is fully charged and properly connected. If the issue persists, consult the user manual for further troubleshooting steps.
- String Breaks Quickly: This could be due to using the wrong type of string or trimming overly thick vegetation. Stick to the recommended string size and avoid overworking your trimmer.
Tips for Maintaining Your Stihl FSA 60 R
Maintaining your Stihl FSA 60 R is key to ensuring it lasts for years to come. Here are a few tips to help you keep your trimmer in top condition:
- Regularly check and clean the air filter to prevent clogging.
- Store the trimmer in a dry, cool place to protect it from moisture and extreme temperatures.
- Inspect the trimmer for signs of wear or damage after each use and address any issues promptly.
By following these tips, you'll extend the lifespan of your Stihl FSA 60 R and ensure it's always ready for action.
Conclusion
Replacing the string on your Stihl FSA 60 R doesn't have to be a daunting task. With the right tools, a little patience, and this comprehensive guide, you'll be a pro in no time. Remember, maintaining your trimmer is just as important as using it, so don't neglect those routine checks and replacements.
Now that you've learned how to replace the string on your Stihl FSA 60 R, why not share your newfound knowledge with others? Leave a comment below or share this article with your fellow lawn care enthusiasts. And don't forget to check out our other guides for more tips and tricks to keep your outdoor tools in top shape!
Table of Contents
- Understanding the Stihl FSA 60 R
- Why Replace the String on Your Stihl FSA 60 R?
- Tools You'll Need for Stihl FSA 60 R String Replacement
- Step-by-Step Guide to Stihl FSA 60 R String Replacement
- Step 1: Turn Off the Trimmer
- Step 2: Remove the Cutting Head
- Step 3: Inspect the Spool
- Step 4: Thread the New String
- Step 5: Reassemble the Cutting Head
- Step 6: Test the Trimmer
- Troubleshooting Common Issues
- Tips for Maintaining Your Stihl FSA 60 R
- Conclusion
That's it for now, folks! Happy trimming and stay tuned for more lawn care tips and tricks. Cheers!